
Improve performance by disabling Windows 7 services
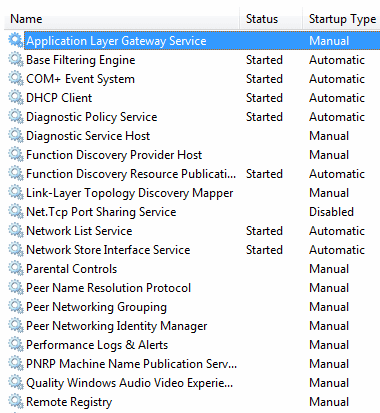
Windows 7 loads many services at startup, most of them are essential for the core system features. By disabling unnecessary services, the performance can be improved significantly, especially on computers with low system resources. The command SERVICES.MSC in the search field of the Start menu will start the management console to tweak the services (the management console is also available by Administrative Tools in the Control Panel, option Services). In the management console, a description of each service is shown, including the relationship (dependencies) between the different services.Disabling services
The specific description for each service is shown in the left pane. This information can be of use, if you are not sure if it is safe to disable a service. Because there are many services and the description is not always clear, it can be time consuming to find out which services can be disabled safely, and which services better stay as they are. For some services, the effect is even unpredictable which will result in strange future problems.By double clicking a service, the tab General opens with a description of the service and the current start up settings. Most services have Manual (started only if needed by a program) or Automatic (started by Windows) as startup type. The startup type Automatic (Delay Start) is a special startup type which makes sure the startup process of Windows is not delayed by loading these kind of services. Services with the startup type Disabled won't run at all, even if a program needs the service. In most cases a strange error message is shown by the program which does not seem to relate to a disabled service. The tab Dependencies gives information about which other services the service depends on and which other services depend on the service. It is obvious not to disable a service if other services depend on it.
|
|
TWEAKING SERVICES WITH MSCONFIG?Services can be disabled with the tool MSCONFIG (tab Services) as well. However, this is not the place to tweak the services! Use the Management Console to make changes in the settings of the services. It is also safer because it is not possible to disable essential services. |
Disabling services to recover system resources
The list below shows multiple services which are reasonably safe to disable. But remember to read carefully the service description before disabling a service! Keep in mind that possible future error messages can be created (and solved...) by changing the startup type of the services. If there is any doubt about the effect of disabling a service, rather keep it unchanged! If certain functionalities don't function properly anymore, just reactivate the service by changing the startup type to Automatic or Manual. Do not disable to many services at once, but take some time to investigate the individual changes and do not disable services where other services depend on! If you hesitate disabling a service permanently, change the startup type to Manual first.Adaptive Brightness: This service can be disabled when the monitor doesn't support detection of ambient light with sensors to adjus the display brightness depending on the lighting conditions.
Application Experience: Investigates the compatibility of older programs and searches for updates for known problems. Although disabling this service doesn't have negative side effects, it is better to keep it unchanged.
BitLocker Drive Encryption Service: This service can be disabled when BitLocker is not used to encrypt files (and a secure startup of the operating system).
Bluetooth Support Service: This service is only useful when there are devices which are connected by Bluetooth.
Computer browser: Tracks the computers (and files) on the network and maintains an updated list. This service is only useful in case of a LAN where the computers share files with each other. After disabling this service, it is still possible to browse the network. The service depends on the services Server and Workstation.
Desktop Window Manager Session Manager: Necessary for the new Aero Glass-interface. Only disable this service if the new Aero Glass-interface is not used.
Diagnostic Policy-service and Diagnostic System Host: For the detection of problems, troubleshooting and presenting known resolutions for Window components. If there are no problems expected anymore, it is safe to disable the service.
Disk Defragmenter: This services provides (automatic) defragmentation of the partitions. When this service is disabled, disable the defragmentation task as well (control panel, item Administrative Tools, Task Scheduler, Task Scheduler Library, Microsoft, Windows, Defrag).
Distributed Link Tracking Client: Makes sure that linked files on multiple computers in a network stay linked. This service can be disabled safely, because in most home situations, this option is not used at all.
Encrypting File System (EFS): Provides encryption of files on NTFS partitions. It is safe to disable this service when encryption is not used.
Function Discovery Provider Host: Enables sharing files over the network with other computers. If this service is disabled, the shared files are no longer visible by other computers in the network. Disabling this service is also possible by disabling the option Network discovery in the Network and Sharing Center in the Control Panel.
Function Discovery Resource Publication: This service publishes the shared files and printers so they can be discovered by other computers in the network. Disable this service if it is not necessary that other computers are able to discover shared resources. This service can be disabled as well by disabling the option Network discovery.
HomeGroup Listener and HomeGroup Provider: Services for sharing personal files using the HomeGroup. When the HomeGroup is not used, both services can be disabled.
Human Interface Device Access: Support for a multimedia device like a remote control and hot buttons on keyboards (like the volume and e-mail button).
Internet Connection Sharing (ICS): For sharing the internet connection with other computers in the network (this computer operates as a router). If a router is used to connect all the computers to the internet, this service is not needed.
IP Helper: Support for an IPv6 connection over a IPv4 network. IPv6 is the new connection type of the future which makes it possible to give every computer connected to the internet a unique IP address instead of one single IP address for the internet connection (where the connected router uses special IP addresses for home use). The use of IPv6 has some advantages (but also disadvantages) but at the moment, there are not many providers supporting this new connection type. If IPv6 is not supported or used, disable the service for security reasons.
Network List-service and Network Location Awareness: Without these services, the network connection still works fine, but it is no longer possible to show the status in the system tray and the Network and Sharing Center. To keep this functionality, it is better not to disable these services.
Offline Files: Makes the network shares also available when the share is offline. The edited files will be synchronized automatically the first time the network share has become available. If this option is not desired, then it is better to disable this service.
Portable Device Enumerator Service: Enforces group policy for removable mass-storage devices. If this service is disabled, it is no longer possible to read/write protected devices. If it is not necessary to access removable mass-storage device using group policy, it is safe to disable the service (the removable media will still be accessible by applications which don't rely on this service).
Remote Access Connection Manager: Necessary for managing dial-up and virtual private network (VPN) connections. If the computer is connected to a router and no VPN connection is needed, this service can be disabled safely. Because the service Remote Access Auto Connection Manager depends on this service, it can be disabled as well.
Remote Desktop Configuration, Remote Desktop Services and Remote Desktop Services UserMode Port Redirector: Services needed for Remote Desktop, when Remote Desktop is not used it is safe to disable these services.
Remote Registry: Thanks to this service, external users are able to make changes to the registry keys over the network connection. This option is not safe, therefore it is better to disable it.
Routing and Remote Access: Disable this service if it is not desired that other computers are able to dial in to get access to the local network.
Server and Workstation: Necessary to share files and printers with other computes within a network. If this is not the case, it is safe to disable these services. After disabling the services, it is still possible to access shared folders on other computers. If these services are disabled, it is no longer possible to activate the option File and printer sharing in the Network and Sharing Center, task Change advanced sharing settings.
Shell Hardware Detection: This service starts the auto play of devices like DVD drives and memory cards. This service is also responsible for showing a window with the options which action to take with a certain type of file. If you don't like this function, disable this service. Because the service Windows Image Acquisition (WIA) depends on it, it has to be disabled as well.
Tablet PC Input-service: Enables the Tablet PC and ink functionality. If the computer is not a Tablet PC, it is safe to disable the service.
Task Scheduler: It is not possible to disable this service. That's no problem, because the most scheduled tasks won't run if the computer is actively used by the user. The settings of the scheduled tasks can be changed by the Administrative Tools in the Control Panel, Task Scheduler. The possibilities to add and change tasks have improved significantly compared to Windows XP.
Themes: Disable this service if there is no need for the visual effects like the new Aero interface. Disabling is only advised for slow computers because the new interface is one of the most important reasons to upgrade to Windows Vista or Windows 7. To disable visual settings manually, go to System in the Control Panel, Advanced system settings (in the left task pane), tab Advanced, button Settings (sub Performance).
Windows Audio and Windows Audio Endpoint Builder: Keep these services enabled to be able to hear the audio effects.
Windows Biometric Service: This service is used for capturing, comparing, manipulating and storing biometric data (like finger prints or iris scan).
Windows Defender: Additional scanning software for unwanted, malicious software. When Windows Defender is turned off (control panel, item Windows Defender, option Tools, link Options, task Administrator), the startup type is set to manual automatically. If this service is disabled, Windows Defender can no longer be opened by the control panel!
Windows Error Reporting-service: Generates an error message when a program no longer responds. If this service is disabled, error reporting is no longer possible and existing solutions are not delivered anymore.
Windows Firewall: If a software firewall is installed, the Windows firewall is no longer needed. For safety reasons, it is better not to disable it.
Windows Image Acquisition (WIA): For transferring images from a scanner or camera to the computer.
Windows Media Player Network Sharing-service: If it is not desired to share Windows Media Player libraries, it is safe to disable this service.
Windows Search: Provides content indexing (like personal files and e-mail) to speed up searching this content. Disabling this service will slow down the search process to a file by file search. Indexing takes place in the background at a moment the computer is not used, for this reason it is not necessary to disable the service.
Windows Time: For automatically synchronizing the time and date. If it is not essential that the shown time is correct, disabling the service is no problem.
WWAN AutoConfig: Service for connecting the computer to a network (internet included) by a mobile broadband service like GSM and CDMA.
Other services
It is advised to keep the services which are not mentioned on this page unchanged.Hope this is Informative for you :)

 One
of the most tried and true ways to speed up your boot process is to
keep unnecessary programs from starting up with your computer. You can
do this by running
One
of the most tried and true ways to speed up your boot process is to
keep unnecessary programs from starting up with your computer. You can
do this by running  Many people argue that disabling Services from
  If
you're dual-booting your machine, then your boot menu probably has a
"timeout value", meaning the amount of time it waits for you to make a
selection before it just boots into the default OS. On Windows, this
timeout value is often 30 seconds, which is a long time to wait if you
aren't looking directly at your screen. To change this timeout value,
head to
If
you're dual-booting your machine, then your boot menu probably has a
"timeout value", meaning the amount of time it waits for you to make a
selection before it just boots into the default OS. On Windows, this
timeout value is often 30 seconds, which is a long time to wait if you
aren't looking directly at your screen. To change this timeout value,
head to  Your
computer loads a lot of drivers when it first starts up, some of which
you might not even use. Head into the Device Manager from the Start
Menu's search box, and look for anything you aren't using—Bluetooth
controllers, modems, and virtual Wi-Fi adapters are common culprits.
Right-click on the entry you want to disable and hit "Disable". Remember
to only do this with things you don't actually use—if you use Wireless
Hosted Networks, you'll need to keep those virtual Wi-Fi adapters
enabled. It's also worth mentioning here that keeping all your drivers
up to date will help this portion of the startup time, too (which you
can do with the help of a program like previously mentioned Device Doctor).
Your
computer loads a lot of drivers when it first starts up, some of which
you might not even use. Head into the Device Manager from the Start
Menu's search box, and look for anything you aren't using—Bluetooth
controllers, modems, and virtual Wi-Fi adapters are common culprits.
Right-click on the entry you want to disable and hit "Disable". Remember
to only do this with things you don't actually use—if you use Wireless
Hosted Networks, you'll need to keep those virtual Wi-Fi adapters
enabled. It's also worth mentioning here that keeping all your drivers
up to date will help this portion of the startup time, too (which you
can do with the help of a program like previously mentioned Device Doctor). This
should go without saying, but we'll say it anyway: install some
antivirus software, keep it up to date, and run a regular scan. This is
more of a preventative measure than an actual boot-speeding tip, but if
you ever do get malware, it's sure to slow your computer's boot time. With a good antivirus around like Microsoft Security Essentials, you'll be more protected against that happening. Don't like MSE? There are some great ones out there too, so there's no reason not to have one around.
This
should go without saying, but we'll say it anyway: install some
antivirus software, keep it up to date, and run a regular scan. This is
more of a preventative measure than an actual boot-speeding tip, but if
you ever do get malware, it's sure to slow your computer's boot time. With a good antivirus around like Microsoft Security Essentials, you'll be more protected against that happening. Don't like MSE? There are some great ones out there too, so there's no reason not to have one around.
 Installing
more RAM has always been an effective way of speeding up your computer,
and that hasn't changed. RAM is pretty cheap these days, so if you're
running low, there's no reason not to stock up and make your computer
run a little smoother. We've gone over how to replace it in both a desktop and a laptop, and even for the inexperienced, it's a pretty simple procedure.
Installing
more RAM has always been an effective way of speeding up your computer,
and that hasn't changed. RAM is pretty cheap these days, so if you're
running low, there's no reason not to stock up and make your computer
run a little smoother. We've gone over how to replace it in both a desktop and a laptop, and even for the inexperienced, it's a pretty simple procedure. When
you first start up your computer, it spends a significant amount of
time asking the network for an IP address. You can get rid of this
process altogether by giving your computer a static IP address that
never changes. Not only does this make your network easier to manage
(since each computer will always have the same IP address), but it can
shave a bit more time off your startup. Here's how to do it in different versions of Windows.
When
you first start up your computer, it spends a significant amount of
time asking the network for an IP address. You can get rid of this
process altogether by giving your computer a static IP address that
never changes. Not only does this make your network easier to manage
(since each computer will always have the same IP address), but it can
shave a bit more time off your startup. Here's how to do it in different versions of Windows. These
days, your hard drive is probably the biggest bottleneck in your
machine. One of the best upgrades you can make to your computer is to
install a solid state drive, which has super-fast read times that can
speed up your startup considerably. They're certainly not a cheap upgrade, nor are they without their own maintenance requirements,
but if you want to speed up your computer and its boot time, you can't
go wrong by installing an SSD. The difference will be shocking.
These
days, your hard drive is probably the biggest bottleneck in your
machine. One of the best upgrades you can make to your computer is to
install a solid state drive, which has super-fast read times that can
speed up your startup considerably. They're certainly not a cheap upgrade, nor are they without their own maintenance requirements,
but if you want to speed up your computer and its boot time, you can't
go wrong by installing an SSD. The difference will be shocking.